How to use your cymbal sounds to sound better as an e- and a-drummer (part 1)

The formula for the right choice of your cymbals
Series: Discover the treasures in the freight hold of your e-drum module
Practical and explained to the point:
- Cymbals as a crew: each cymbal has a specific task – and must play to the other crew members….
- Cymbal sound as part of the music style: that’s why you can find so many different sound characters
- 4 ingredients and a secret additive: with this formula you prepare an outstanding distinctive sound!
Depending on the model, your e-drum module may have a fairly large pool of cymbals on board. This gives you an advantage over the a-drummer who is forced to put money on the table for each cymbal.
The choice of cymbals has a great influence on the sound of the kit. The seeming advantage of a large selection in the e-module (or in the store) therefore also carries the risk of screwing up.
As long as you don’t understand the context, you won’t be able to select the right sounds and process them correctly, nor will you be able to identify an inappropriate sound that may be downright annoying.
At best, you won’t be bothered by the fact that your overall sound is under-optimized and you’ll miss out on using – and enjoying – the sonic potential of your e-drums.
More likely, though, you can’t shake this feeling that something sounds wierd without being able to do anything about it. If you’re lucky, it sounds better with other cymbals – but do you really want to rely only on your luck?
It’s better to understand the basics and know exactly why you’re using which cymbals.
Here comes a formula of 5 ingredients that will always enable you to match your cymbal sounds to your drum kit from now on. And as with any formula, the key is to practice until you get it right without instructions – and then add your own personal touch.
This will be tastier than any in-flight menu!
Ingredient number 1: Assemble your cymbals as a crew
A crew is known to consist of several members working together on a task; each individual member of the crew takes on a specific part of the task. The base crew consists of the minimum members required to complete the task.
On a standard drum set, the basic cymbal crew consists of the following instruments.
- Hi-Hat (as a cymbal pair)
- Crash
- Ride.
With these three types of cymbals you can cover everything that is required in popular music styles – whether Pop, Rock, Blues, Jazz, Soul, Hip Hop, Metal, R&B …
That’s why exactly this basic crew is also part of every beginner’s set, which is supposed to offer you all the components you need at least to be able to play drums without any restrictions.
With e-drums you also have the advantage that you can choose from several instrument sounds from each instrument category. The only important thing is that you have enough pads for at least a Crash, a Ride and of course the Hi-Hat.
Let’s take a closer look at each type.
Hi-Hat(s)
The term ” Hi-Hat ” refers to both the stand on which the Hi-Hat cymbals are mounted and the Hi-Hat cymbals themselves. Since the cymbals perform as a pair, the term Hi-Hats is also used (i.e., plural) when referring to the cymbals.

Main task of the Hi-Hat: Create rhythmic stability
In the vast majority of cases, a so-called ostinato is played on the Hi-Hat, which is a rhythmic phrase that repeats itself more or less stoically. This provides, first of all, that the subdivision of the rhythm is emphasized; secondly, the other parties (yourself with the other instruments on the set and/or other band members with their instruments) can follow the ostinato very well.
“Flight on sight” if you only have the Hi-Hats available
This is a rather hypothetical situation: you can handle it even if you don’t have any cymbals except for the Hi-Hat. The Hi-Hat allows you to play the rhythms softly (with Closed Hi-Hat), or loudly (with Half-Open Hi-Hat). But you can also set medium and loud accents, which you can let fade out or bring into rhythmic context via foot pedal (with Open Hi-Hat).
In other words, the Hi-Hat is a very versatile instrument that you can use to enrich your playing in different ways.
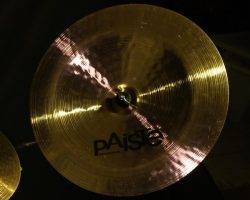
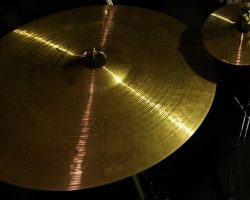
Crash

Also, if ” Crash ” is the name of a specific type of cymbal, you can also put other types of cymbals in a category that you call ” Crash ” – that is, if the other types have the same task as the Crash Cymbals.
Main task of the Crashes: Set accents
Use Crashes to create accents, for example to emphasize the beginning of a new song section. Crashes are often played together with the Bass Drum, because they complement each other perfectly (Bass Drum in the low frequencies, Crashes in the high frequencies).
Crashes are less suitable for rhythmic playing. When swinging, they generate a background noise that drowns out the impact of the stick. This makes it hard to gain a rhythmic orientation.
Size and thickness determine the sound
The bigger and thicker a Crash Cymbal is, the longer it takes to decay.
So if you want your accent to be massive, play a large or thick Crash; if you want the accent to be subtle and fade quickly, choose a small thin cymbal.
If you can only have one Crash available, choose a standard 16″ diameter Crash which is not too thick for a good starting point between bulky and fine accents.

Other cymbals in the “Crash” category
For fine accents there are the Splashes, which are very thin and small cymbals (most often in 8″, 10″ or 12″ diameter). For powerful sounds, Chinas are very interesting (often in diameters from 18″ to 24″, also in smaller diameters as a short effect). Chinas (also called China Type) have a very characteristic sound.
For a clear bell-like sound that lasts a long time, there are the Bells.
Manufacturers implement their individual approaches and ideas for all categories of cymbals. Therefore, in addition to the above-mentioned (Splash, China, Bell), there are a number of other types of cymbals – from exotic (for example, Trash made of several cymbals placed on top of each other) to peculiar (such as angular or perforated cymbals).
For you, in the end, it’s important to check if a cymbal serves the category you’re looking for.
Ride
The Ride Cymbal is a perfect counterpart to the Hi-Hat. Interestingly, there are styles in which a Ride is practically non-existent (Reggae), while elsewhere it is absolutely elementary (Swing). In between, the Ride moves at different levels of importance depending on the style. Usually, the Ride shows up exactly once on the set – and yes, you should have one.
Main task of the Ride cymbal
With the Ride you create rhythmic stability, rhythmic accents and furthermore a (more or less) overlaying background noise that can influence and ” glue together” the overall sound of your set (or even the band!).
This makes the Ride perfect for louder parts of the song, such as the chorus or a guitar solo. It raises the sound level and acts as a rhythmic landmark at the same time.
thicker than Crashes
Ride Bell for rhythmic accents
The bell varies in effect, depending on the cymbal. It produces a bell-clear sound that cuts through quite well and comes across as a relatively short sound. Therefore, the Ride Bell is often used to set accents in the rhythm (unlike the Crash, which is more about single accents independent of the rhythm).
Some Rides have a monstrous bell (Bell Ride), others no bell at all (Flat Ride).
Ride Edge for single massive accents
Ride Cymbals are rather thick and have a fairly large weight. If you play a Ride like a Crash, i.e., if you hit it hard at the edge, you get a very powerful crash sound that can decay for a long time and can sound uncontrolled. It depends a lot on the individual Ride Cymbal how well it can be used for crash accents as well.
Ingredient number 2: Get your cymbal set in tune – either with the music style, or…
Let’s first look at your sound from the perspective of musical style.
As so often, there are no clear rules, but there are proven methods. Playing a fine style with extra heavy cymbals makes not much sense. For example, a jazz trio with grand piano and acoustic bass is basically a relatively quiet affair. You’ll fit in best as a drummer if you not only play quietly yourself, but also use thin cymbals that don’t feel bulky.
With the same cymbal set, on the other hand, you won’t have much of a chance to make your mark in a Rock band. Logical, right?
So the more clear you are about what you want to do as a drummer (keyword positioning!), the more targeted you can choose your cymbals. Tip: use the Internet to see and hear which drummers are using which cymbals in which bands. Pay attention to the number of cymbals, the relationship to the drum set and the band (quantity, size, volume).
Listen to your favorite music story(s) – and retell them your way
Not only bands and musicians, but also the major cymbal manufacturers have helped shape entire musical styles with their various series since they have developed in various ways.
For example, Paiste’s 2002 series is closely associated with 1970s Rock music due to its sound and assertiveness. For fine Jazz, on the other hand, they are not a good choice, as their thickness means they want to be played loudly to fully develop their sound. Instead, there are other series such as the Formula 602,which offers particularly thin cymbals.
So it’s worth taking a closer look at the sound of your favorite drummers and the bands they play in. You can learn a lot in the process that you can apply to your own sound.
Of course, this applies not only to special models of selected manufacturers, but especially to the question of how many cymbals of what type are preferably used.
This will greatly help you to choose a suitable sound for each pad you have available beyond the standard set (Hi-Hats, 1 Crash, 1 Ride). Remember that as an e-drummer you have the advantage of being able to choose from a whole collection of cymbal sounds (for which the a-drummer would have to pay crazy amounts of money).
Now, if you keep this on the screen, you’ll be off to a great start sound-wise
It’s obvious: your drum set should be matched as well, of course! As with cymbals, the size, choice and tuning of the heads have a significant effect on the sound and volume of the drums.
Again, for Jazz trio, for example, you’re better off with small high-pitched toms, while fat 70s Rock calls for big deep and voluminous drums.
Even if you can adjust the volume on the e-set technically, a low-pitched sound from a Bass Drum will naturally seem more powerful than a short high-pitched sound from a Small Tom.
Hold on a minute!
what do you actually do when it’s not about a certain style of music at all?
Find the perfect approach to targeting your sound with these three perspectives
In this article, we’ll talk primarily about your cymbal sounds. However, this does not mean that they come first. As an e-drummer, you have the advantage of being able to conveniently switch between different points of output.
So you can approach the design of your drum sound from the following perspectives:
- Match drum sounds and cymbal sounds to a particular style of music.
- You have already found a great sound of the drums and now adjust the cymbals
- You’ve already put together your cymbals and now you’re adjusting the sound of the drums.
Choose the perspective that works best for you to get clarity on where your sound journey is going all along.
This brings us to the next ingredient, namely:
Ingredient number 3: Match your cymbals with each other
It remains a matter of taste: is your cymbal set a wild assortment of different manufacturers and types, or do your cymbals follow a red thread of sound, being from the same series by the same manufacturer?
There can be no clear rules here, of course. But now you know about the characteristics of cymbals and the role they play. Therefore, you also realize that combining, say, a thin jazzy Crash with a huge Power Crash might not make much sense in general.
If you’re new to the topic, make it as easy as possible to get started:
- Choose a reputable manufacturer (the name of the cymbal in your e-drum module’s sound bank often suggests its origin, such as “ZD18Cr” for “18” diameter Zildjian Crash).
- Choose a well-known and fairly premium series. The more clearly it goes in the direction of the entry-level series, the smaller the differences between the manufacturers are: they all have in common that the low-cost production unfortunately does not allow fine evolutions of the sound.
- If no reasonable information comes from the name of the sound, use this circumstance to train your ear. Does the individual sound have definition and clarity? And does it match other sounds?
- If possible, combine sounds from the same series of the same manufacturer. For example, combining a 14″, a 16″ and an 18″ Crash of the same series/model is practically a no-brainer with renowned manufacturers like Paiste, Zidjian or Sabian. It will sound good and harmonious.
On your solid base you can experiment better
With a coherent standard cymbal set, you can now get to work on the expansion. Try exotic sounds, such as very small chinas, cymbals with rivets, cymbals that are extra noisy or sound extra long, are extra deep and or break the acoustic norm. (For example, some e-drum modules can calculate a Ride Cymbal with a diameter of 40″. Practically impossible as an acoustic Ride).
With this approach, you will gain experience that will make it much easier to evaluate a “patchwork” pool set with different models from different manufacturers.
Ingredient number 4: Use your cymbals right
There is a principle among sound engineers in recording studios:
“If it doesn’t want to sound right, change the musician first – not the instrument!”
The greatest sounds of the most expensive cymbals don’t bring much if they are not used properly. As a drummer, you should certainly know what you’re doing – and not just in the studio.
CAUTION! This does NOT mean that you have to be a virtuoso to be a good drummer!
It just means that you should be clear exactly what you can do, what you can’t do, what you want and what you don’t want.
As with choosing the right cymbal sounds, it’s a good idea to go back to proven ones to get a coherent result (in other words, to sound good).
Of course, when you’re drumming on your own, you have almost foolproof freedom because you don’t have to interact with any band members. Therefore, we focus on the situation of playing a piece of music with the band or to a play-along.
Use the song structure as a guide
You can use the cymbals wonderfully to break the song down into its component parts! Let’s imagine a “standard” song. This has several parts with different function and effect:
Intro with a prominent riff or melody
If the band plays a loud intro and/or long notes occur, you can appropriately shift the ostinato to the Ride. As an example, consider “The Hounds Of Winter” by Sting. Nothing fancy is played on the Ride, but it nicely blends the sound texture with the keyboard pads.
In the following video of a cover band you can see and hear well what the drummer does at what place and how he affects the different parts of the song with the cymbals. (Put on reasonably good headphones).

By loading the video, you agree to YouTube’s privacy policy.
Learn more
Arvid Filipsson and Sting Tribute Band Skurups at folkhögskola 2015
Verse, sometimes with B-part (bridge) to the chorus
In the verse, lyrics are delivered or a melody (the theme) is performed. These important components need space and clearance in the song, so the band will usually play quieter and with shorter notes during the verse. You can support this perfectly with the Closed Hi-Hat and a (relatively) light groove.
Chorus
The chorus is the conventional part by which a song is identified. It has fewer lyrics than the verses, and for hit-ability it is an advantage if the chorus (repeated several times) is easy to remember and sing along with.
Since the chorus should be very different from the verse, it’s generally a good idea to counter the verse played with the Closed Hi-Hat with a chorus that you play with the Ride or Open Hi-Hat.
By loading the video, you agree to YouTube’s privacy policy.
Learn more
Example: „Wheel In The Sky“ by Journey, a Rock classic from 1978
Coda (also called C-part) and/or solo
The coda is often used in the song to summarize the content of the lyrics, to convey the moral, or to invoke an unexpected twist. This can happen either extra quiet or extra loud. Maybe a particularly “bitchy” rhythm comes into play now, or maybe the rhythm breaks down completely. Listen carefully to what the song is doing at this point and use your cymbals accordingly.
For a solo (be it guitar, saxophone or keyboards) often one of the previous song parts is used as accompaniment. The listener should concentrate on the solo and already knows the song part. Therefore, it is usually not advisable to suddenly play the song part differently than before.
So, for example, if the solo runs through the verse and you played closed Hi-Hat in the verse, then it might be better to stay with it and not switch to the Ride in the solo. Such decisions help shape your style, so make them with awareness.
Be guided by your musicians
The structure is, of course, only one of several pilots through the song. There are loads of extra parts, accents, room for improvisation, etc.
Therefore, it is equally important to pay attention to such spots and get on the screen what your fellows are doing. For example, if the band plays short accents in a catchy riff, you can emphasize these accents by quickly muting crashes. (Most e-drums support this so-called “choke” function: play the cymbal and immediately afterwards choke the sound with your thumb on the top and the remaining fingers on the bottom of the cymbal rim).
The intro of “Eye Of The Tiger” by Survivor is a famous prime example of this situation. At first, the Crashes are muted, but at the end of the riff, they ring out, causing the riff to literally explode. Great effect with the simplest of tools!
No matter what the situation is: listen carefully, think about which cymbal fits into the situation as played and thus use your cymbals specifically.
Basically quite simple 😉
The secret add-on: how to stand out and give the sound your own signature
Some areas have clear laws. If you build a bridge without respecting the laws of statics, the bridge will collapse. There’s no wiggle room there.
But when the laws are not set in stone, methods develop that simply work well in practice. If something has proven to be effective, then it will be used again and again. The four ingredients of a good cymbal sound are not subject to any laws, but have proven themselves.
This is your chance to develop your own sound!
Now that you know the proven methods, you should use them consciously – and that includes consciously not using a proven method. Try it out in any area. How about a cymbal set of just Splashes? Why not play two Rides or give the Ride function to the China? Get involved with such thoughts and try it out!
You have a huge advantage with the selection of sounds your e-drum module offers you! Because you are not only limited to the cymbal sounds, but can fly a completely different sound course in the percussion section, with the effect sounds and possibly with your own samples – and thus still (or just because of it!) serve the music.
However, don’t break all the rules at once. If you leave the familiar corridor too far, you run the risk of losing your way completely. Your audience and also your band members should be able to “stay on board”.
Conclusion
Never again problems with the cymbal sound! Four basic ingredients help you as an a- and e-drummer to achieve a balanced sound of your cymbal set. Practice with it to turn the ingredients into a formula that will enable you to easily serve up a high standard of sound and play with your cymbals in the future.
Add the secret ingredient to the basic formula and create your own cymbal sound that hovers in higher spheres!