

Image AI-generated
Are they really worth your money?
In this article, you’ll find out:
- the thinking mistake many e-drummers make when buying download kits
- how seven different factors interact to create – sometimes quite significant – differences between what you hear in a demo and what you experience on your own drum set
- why download kits are actually a good thing, and how to make sure they truly pay off for you
Big sound, great playing, clean visuals – the demo video finally convinced you.
So, full of anticipation, you go ahead and buy one, maybe even several download kits for your drum module, load them in, put on your headphones, and start playing.
And then reality hits. No real punch in the low end, no satisfying snap in the highs, no “Wow!” moment.
Somehow, it just doesn’t live up to what you expected, because it doesn’t sound like the demo video; not just different, but, to your ears, simply worse.
Honestly, at that point it’s only natural that a thought like this starts to creep in:
“I’ve been ripped off, guys.”
Sounds familiar? If so – don’t worry! It’s very unlikely that you’ve been tricked.
What’s much more likely is that you’re running into a thinking mistake that a lot of e-drummers make, especially when it comes to purchased download kits.
Download kits can absolutely be an excellent starting point when you’re working on your own sound, but they are not the end of your sound journey.
They simply cannot be, because they were created by someone else. Whether that person intended to or not, they inevitably brought their own experience, their own preferences, their own playing style, and their own technical approach into those kits, all of which will differ from yours to some degree (without that difference being “better” or “worse”, just different).
Which leads to a simple but important realization:
A download kit can’t perfectly match your expectations right out of the box.
So does that mean that download kits are pointless at the end?
And is that thinking mistake – the confusion between a starting point and a finished result – somehow being used by providers to sell you something that only sounds good in a polished demo video?
If so, they would have to invest a significant amount of effort into “faking” the sound in those demos, just to make the kits appealing enough to convince you to buy them.
Which wouldn’t really make sense, because creating download kits already requires a lot of work, and putting additional effort into making them sound artificially better would only complicate things without adding real value.
It’s far more logical (and far more effective) to focus on creating genuinely good kits in the first place, because good kits lead to satisfied customers, which lead to a healthy business, which leads to a win-win situation. Simple as that.
That’s why at least with Gear Force One, you can assume that what you hear in the demo video is exactly what comes out of the drum module, because there’s no additional processing or hidden effects involved.
So why does it still sound so different when you play those exact same kits on your own setup?
The answer may surprise you:
There are no fewer than seven factors that determine how your sound actually turns out.
Once you understand these seven factors – and, more importantly, once you learn how to work with them – you’ll be in a position to turn any purchased download kit into YOUR kit.
So stick with this, read all the way through, and actually put these ideas into practice, because doing so won’t just improve your current situation, but will also help you get better results with any download kits you use in the future.
And just to be clear:
Buying ready-made kits that were programmed by professionals is, in itself, a very good idea, because it saves you time and effort while giving you a solid foundation – but only if you take the next step and adapt those kits to your own situation.That’s what makes the investment truly worthwhile.
Buckle up, we’re taking off!
HOW TO GET TO YOUR DREAM KIT
With the right adjustmets, you’ll get there.
In the following, you’ll get to know the seven most important factors that shape your final sound, and while they don’t all carry the same weight, they do interact with each other, which is why it makes sense to work on as many of them as possible and align them as closely as you can.
And once you’ve gone through the first six factors, the seventh one will most likely give you that final push.
Factor 1: Your Headphones
Image AI-generated
Whether you’re using headphones, a monitor speaker, or even a full PA system, the following applies in all cases – although the effect can be even more pronounced outside of headphones – but in most situations, headphones are what we’re dealing with.
Even without going into technical details like impedance or transient response, it should be clear that no two headphone models sound exactly the same, and in fact, some headphones match certain modules better than others, which has to do with the built-in headphone amplifier of the module.
But the key point, when it comes to the difference between a demo video and your own playing experience, is this:
The person who programmed the download kits used a specific pair of headphones – and that pair is very likely different from yours.
Every set of headphones has its own sonic character. Some are designed to sound as balanced and neutral as possible, so they can serve as a reference, but as e-drummers, we’re usually after something else entirely – we want impact, we want energy, we want it to feel like something is happening.
Which often means that our headphones deviate, more or less intentionally, from a perfectly flat response curve, for example by emphasizing the low end to create more “weight,” or by pushing the highs to get more of that “in-your-face” presence.
Now, if the programmer’s headphones had a strong high-frequency presence, they wouldn’t need to boost the highs very much when shaping sounds like Crash cymbals. If your headphones, on the other hand, are more restrained in that area, then those same Crashes will sound darker on your setup – not necessarily worse, but definitely different.
There are several ways to deal with this, but the first thing you should do is surprisingly simple:
When you watch a demo video, use the exact same headphones that you use when playing your e-drums, and make sure that any additional processing from your audio interface or soundcard is turned off – no EQ, no presets, everything set to neutral.
The simplest method: use the original headphones
You could try to find out which headphones were used when the kits were created and get that exact model, because that would ensure that you’re hearing what the programmer heard.
However, this approach comes with a few practical downsides.
- You have to find out which headphones were actually used, and not every provider shares that information; even if they do, it might not be consistent across different kits.
- There’s no guarantee that you’ll like those headphones, whether in terms of comfort or sound, and it doesn’t make much sense to use a piece of gear just because someone else used it—you need to feel comfortable with your own setup.
- Especially if you’re working with an older module, the exact model might not even be available anymore, or only hard to find in good condition.
Which leads to a more practical perspective:
Instead of chasing different headphones, it’s usually much more useful to have one pair that you really get to know, including its strengths and weaknesses.
If you’ve been using a rather mediocre pair so far – something along the lines of “well, I had these lying around” – this might be a good moment to consider upgrading.
Ideally, you’d test different models in a store where you can either use your own module or connect to a similar one, compare several options, and get a feel for how they behave.
Without going too far into detail, if the headphones sound good to you, provide enough volume on your module, and remain comfortable over longer sessions, you’re already on the right track.
In the price range of roughly $100 to $300, you should be able to find a pair that will serve you well for years and function as a reliable reference – although, as always, you can spend a lot more if you want to.
Once you have your headphones: adjust the master settings
If you assume that the programmer used the same headphones across a series of kits or for a specific module, then any difference between their listening situation and yours will be relatively consistent, which means, you can compensate for it.
Let’s say your headphones naturally lack low-end emphasis, and the kits feel like they’re missing that “punch” in the lower frequencies. In that case, you can check whether your module offers a master section where you can adjust the overall sound.
If it does, you can use the EQ there to boost the low end, which will affect all kits at once and give them more weight – although, depending on the kit, the result may vary, so it’s worth experimenting a bit.
If your module doesn’t have a global master section, you might still have a master EQ within each individual kit, and in that case, you can apply the same kind of adjustment per kit, which actually gives you more precise control over the result.
Pro tip: always copy the kit first
Before you start changing anything, copy the downloaded kit to an empty slot. That way, you can experiment freely on the copy while keeping the original as a backup.
And if you ever feel like you’ve gone too far with your adjustments, you can simply copy the original again and start over.
Which makes it very easy to try things out, especially when you’re still new to all of this.
Factor 2: Panning Settings
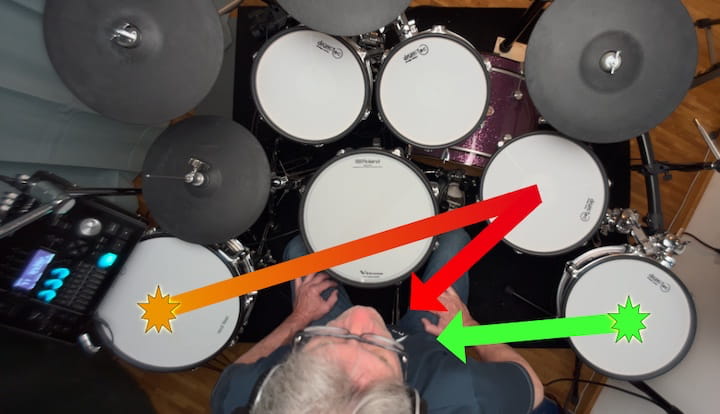
It is often underestimated how important panning settings actually are, and that may well be because this whole area seems deceptively simple at first glance, given that it is adjusted with what appears to be just a single control: you place an instrument somewhere on a listening axis between far left and far right.
And yet, this one parameter can have a surprisingly strong impact on whether a kit feels natural to play – or somehow wrong, even when the sounds themselves are actually good.
Why is panning so important?
Because as an e-drummer, you want to hear a sound coming from where you hit it, and while that may sound almost too obvious to be worth mentioning, it matters a great deal, because our brain, working together with our ears, is extraordinarily good at locating sound sources, and it constantly compares spatial hearing with physical action.
So if a sound comes from the left even though you triggered it on a pad to your right, that mismatch can irritate the brain in a subtle but immediate way, and the result is often that the sound gets judged as “bad,” even though the sound itself may be perfectly fine.
Now here’s where download kits come into play. It is very likely that the person who programmed your kits was working with a setup that differs from yours in terms of layout, and those physical instrument positions served as the basis for their panning decisions.
There are really only two elements where there tends to be broad agreement: Kick drum and snare belong in the center and that’s almost certainly where they were placed.
But beyond that, things can vary quite a bit.
Take a splash cymbal, for example.
Some drummers position it directly in front of them, centered above the toms. Others place it to the left over the hi-hat.
Now, a splash mounted on your left that you hear in the center may still be acceptable to your brain, because we’re used to hearing centered sounds.
But a splash that physically sits in front of you and sounds like it comes from the left? That can feel strangely wrong almost instantly.
The only method that really makes sense: adjust the panning in every kit
As mentioned earlier, the first thing you should do is copy the downloaded kits to free memory locations, and perhaps rename them – something as simple as adding an exclamation point before the kit name is enough to distinguish “your” version from the original. And then you work your way through it. In each kit, adjust the panning of each instrument until the sound appears to come directly from where that instrument sits in your setup.
This may take a little effort, but it is worth doing properly.
Don’t forget layered sounds
Depending on your module, what you perceive as one final sound may actually consist of multiple individual sounds layered together.
A snare could be a simple example. If your module allows separate panning for each layer, you’ll want to make those corrections for every layer involved, otherwise the result may still feel slightly off.
Head and Rim
If you use dual-zone or triple-zone pads, different playing zones may trigger different sounds, so make sure to check whether panning needs to be adjusted for each zone as well.
Some modules allow all zones to be linked under one setting, which makes life easier.
But if the zones are independent, it is worth checking each one.
A note for left-handed players
Keep in mind that simply flipping your headphones around is not really a solution for correcting panning. Even if left and right are reversed that way, you still have to assume that the programmer’s kit layout did not match yours to begin with.
So, if adjustments have to be made anyway, then it makes little sense to do this halfway. Better to do it properly, with the headphones worn correctly and the panning adapted to your actual setup.
Professional work with a clear line.
Factor 3: The Pads
Rubber pads, flat mesh-head pads, acoustic-style shells with mesh heads – they may all be much quieter than acoustic drums, but they still produce sound of their own, and that sound has a character.
This can become a problem, especially when the pad’s own acoustic noise is relatively loud, or particularly noticeable in certain frequency ranges. Those noises are perfectly capable of making their way through your headphones and blending with the electronic sound from the module.
One might hope these two sounds would somehow merge nicely, but that is usually not what happens. More often, the acoustic pad noise overlays and colors the electronic sound, which means what you perceive is no longer the module sound alone.
This, by the way, may not have been a challenge only on your end: The programmer may very well have dealt with similar pad noise while creating the kits and may, consciously or not, have shaped the sounds around those circumstances.
And that’s even not the crucial point here. The crucial point is this:
In the demo video, you don’t hear any of those acoustic side noises, because the audio is taken directly from the module output, so neither room sound, nor pad noise, nor interference can disturb the sound.
However, when you sit at your own kit and play, you do hear those things.
That alone can explain why it sounds different.
The quieter you turn your e-drums down, the more noticeable this effect tends to become.
The obvious temptation might be to simply turn everything up, but that’s not necessarily the best solution, beacause you don’t want to fatigue your ears, and you certainly don’t want to risk your hearing.
So the first goal should be finding a good balance, quiet enough for long and relaxed playing, but loud enough that the electronic sound clearly dominates over mechanical noise.
After that, if needed, there are a few more tricks available.
With rubber pads, there’s admittedly not that much you can do, but experimenting with a different stick – perhaps lighter, or with another tip shape – may help reduce impact noise a little (as always, only if it still feels right to play!).
With mesh-head pads, you have more room to work. One thing you can try is increasing head tension slightly, which may alter and shorten the acoustic attack of the pad in a favorable way. Of course, you don’t want to introduce triggering problems, but usually there is at least some room for improvement.
Acoustic-style shells with mesh heads – especially deeper shells – can sometimes develop resonances in the low-mid frequencies that are both annoying and prone to lingering.
Here, however, you have an advantage: There is space inside the shell for using some simple damping material, even something as ordinary as a dish towel, that can make a surprisingly noticeable difference.
Just make sure the pad electronics remain untouched so you don’t create triggering issues.
And then there is the floor. Your entire setup – pads, stands, kick pedal – transfers vibration into whatever it sits on, and that in turn excites the surrounding structure. Of course, a heavy concrete floor behaves very differently from wooden flooring with a resonant hollow space underneath.
While you may not be able to change the floor itself, you can add a layer in between. That’s where a drum rug comes in.
A good drum rug not only helps reduce mechanical noise somewhat, but also protects the floor, gives you a stable surface, allows tape markings, and provides grip for Velcro under your kick pedal.
Heavier rugs tend to do a better job than thin lightweight ones. So if your kit has been sitting directly on the floor until now, this may be a good time to change that.
Just to be clear: A rug won’t solve apartment noise issues. That’s not what we’re talking about here.
We’re simply looking at practical ways to reduce pad noise and resonance so they spread less into the room and intrude less through your headphones.
Speaking of room…
Factor 4: The Room

This image of Pam Gear is fictional and was generated using AI.
Pam Gear is a character created by Gear Force One®.
Have you ever played drums inside an airplane cabin? Or maybe in a large airport terminal?
Probably not (although, if you have, that would be impressive!), but even without that experience, you can probably imagine that a drum kit would sound very different in those two environments, not just in tone, but also in perceived loudness.
And by now, you can probably already guess that this doesn’t just apply to acoustic drums, but also to your e-drums, even when you’re wearing headphones.
What’s happening here has to do with how sound travels through a space, and more importantly, how it gets reflected, absorbed, or allowed to spread before it comes back to you.
In a large, open hall, sound waves can travel quite a distance before they hit a surface like a wall or ceiling and get reflected, and while they lose some energy along the way, they still have enough left to keep bouncing around the room for a while, which creates that typical loud and reverberant impression.
In contrast, an airplane cabin is a much smaller, more enclosed space, filled with soft and irregular surfaces like seats and passengers, so the sound is absorbed and scattered almost immediately, which leads to a much faster decay and an overall quieter, more controlled perception.
The acoustic noise generated by your pads, as well as the overall room sound, can actually make its way through your headphones and blend with the signal from your module – and this effect becomes more noticeable the larger, harder, and more reflective your room is.
In other words: The “louder” your room is acoustically, the more it interferes with what you’re actually trying to hear.
To make this even clearer, imagine playing your kit in a stairwell versus playing it in a bedroom.
In the stairwell, sound reflections are stronger and more persistent, which means that both pad noise and room sound will be more present and will overlay your actual drum sound much more noticeably.
In a smaller, softer room like a bedroom, those reflections are reduced, and the interference becomes less significant.
Even if you’re obviously not planning to play in a stairwell, this comparison helps you understand the role your room plays in shaping your perceived sound – and why your experience can differ so much from what you hear in a demo video.
So if room-related noise is an issue for you, and you have access to a smaller or more acoustically “forgiving” space, it might be worth trying your setup there, simply to see how much of a difference it makes.
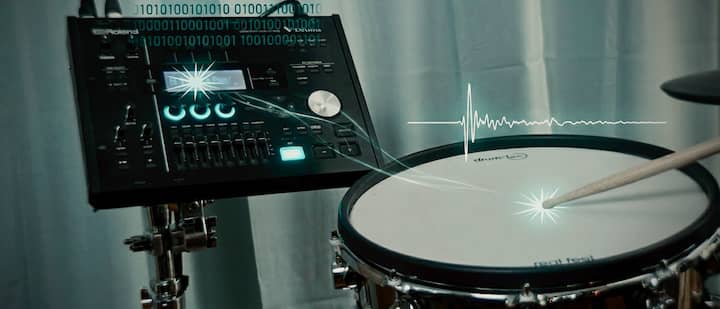
Factor 5: The Trigger Settings

Image AI-generated
After looking at all these external factors, we’re now moving into an area that is much more directly connected to your playing itself.
And this is where things start to get really important, because your trigger settings are essentially the interface between what you put into the instrument and what the instrument gives back to you.
This cannot be stressed enough: Your e-drums must adapt to you – never the other way around.
For example, if your kick drum triggers twice when you play harder, and you find yourself subconsciously holding back just to avoid that issue, then something is fundamentally wrong – not with your playing, but with your settings.
The only real solution is to adjust those trigger parameters until they properly match your playing style.
Now, think about the person who programmed your download kits. They will have set up their trigger settings in a way that works perfectly for them, which allows them to play freely and naturally in the demo video, without having to compensate for technical issues.
Regardless of whether they are “better” or “worse” as a drummer compared to you, that freedom of playing translates directly into how the sound is perceived, because a relaxed performance simply sounds different.
If, on the other hand, your own setup forces you into a restricted way of playing, because the trigger settings are not dialed in properly, then that restriction will also be reflected in your sound. At that point, it doesn’t really matter how good the kit itself is.
So check your trigger settings. If you find work to do, then do it.
Yes, trigger settings can be tedious, and depending on your module, they can feel quite complex at first. But there are two important things to keep in mind:
First, you only have to do this properly once, as a solid foundation.
And second: Almost every trigger-related issue can be solved, because there is usually a parameter designed specifically for that exact problem. That’s a good thing.
Factor 6: Playing vs. Listening

This image of Pam Gear is fictional and was generated using AI.
Pam Gear is a character created by Gear Force One®.
The co-pilot may be sitting in the cockpit as well, but at the end of the day, it’s the pilot who actually flies the plane…
As a playing drummer, you already know this on a very practical level: There’s a fundamental difference between playing a sound and simply listening to it.
When you’re playing, your attention is not primarily focused on analyzing the sound itself, because you’re busy with movement, timing, coordination, and expression, so what you perceive is not just the sound as an isolated signal, but rather the entire experience that comes with it – your motion, your intention, the rebound of the stick, the resistance of the pad, the physical feedback of the instrument.
In other words: The sound is part of an active process.
On the other hand, when you’re just listening – say, watching a demo video while sitting back with a cup of coffee – you’re in a completely different mode.
There’s no physical involvement, no motor activity, no interaction with the instrument, which means your brain is free to focus entirely on the audio signal itself, and as a result, you can evaluate the sound much more precisely in terms of quality, balance, and detail.
So even if the exact same sounds are involved, your perception of them changes significantly depending on whether you are actively producing them or passively consuming them.
And this is exactly why a kit that sounds impressive in a demo can feel less exciting when you’re the one playing it.
There’s no real way to fully bridge that gap, because both perspectives – playing and listening – serve different purposes and rely on different types of perception. Once you’re aware of this difference, it becomes much easier to understand why your experience doesn’t match the demo one-to-one.
And with that, there’s only one factor left. It’s the one that is so obvious, so ever-present, that it’s very easy to overlook, like not seeing the forest because of all the trees…
Factor 7: You, the Drummer!
Image AI-generated
There’s a well-known story about a great guitar player trying out a few instruments in a music store.
As he plays—moving through chords, melodies, little phrases—another customer walks over, listens for a moment, and then says:
“Man, that guitar sounds amazing.”
The guitarist stops, puts the guitar back on the stand, looks at the customer, and asks:
“So… how does it sound now?”
You can swap the guitarist for a pianist, a bass player- or, of course, a drummer.
Because the point stays the same:
It’s the musician that sounds – not the instrument!
When it comes to download kits, this becomes even clearer, because unlike acoustic instruments, where materials, build quality, or manufacturing differences can have an influence on the sound, e-drums are a digital system.
Which means: You and the person in the demo are, technically speaking, using the exact same instrument. There are no variations in wood, no differences in finish, no inconsistencies in pickups or construction. The system will reproduce very consistently what you put into it.
So if you shift your perspective just a little bit, you’ll realize something important:
In the demo video, you’re not primarily hearing the kit.
You’re hearing the drummer playing that kit.
And if you take that idea one step further, the conclusion becomes unavoidable:
When you play those same kits… they will sound like you.
They can’t do anything else.
You bring your own physical strength, timing, musical background and stylistic preferences, all of which shape the result. Playing harder or softer than the person in the demo, phrasing things differently, coming from a completely different musical context – all of that leads to a different sound, even with identical kits.
And just to be clear:
This is not about “better” or “worse.” Every drummer is different, and even two drummers at the same level will sound different on the same kit.
So instead of expecting a download kit to be the final result, it makes much more sense to see it for what it actually is:
A well-built instrument that allows your sound to come through.
Conclusion
If your purchased download kits sound different – or even disappointing – compared to the demo video, it doesn’t mean you’ve been tricked.
What’s really happening is much simpler: You’ve confused the starting point with the finished result.
Download kits are exactly that – a starting point.
And like any starting point, they need to be developed further, adapted, and aligned with your personal setup and your way of playing.
A number of different factors, some technical, some physical, some perceptual, work together to shape your final sound.
And while all of them matter, one factor stands above the rest: What you as a drummer put into your instrument.
No matter how a kit is programmed, the moment you start playing it, it will – first and foremost – sound like you.